# How to use Scaloom with Woodpecker
In order to use your Scaloom analyses in your Woodpecker Campaigns, follow this guide
1.) Export your Scaloom analyses as a CSV file
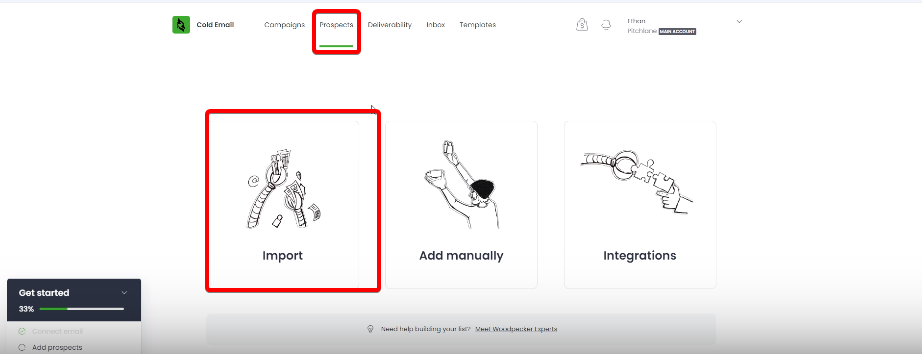
2.) Create a new campaign in Woodpecker
3.) Upload and Select your prospects
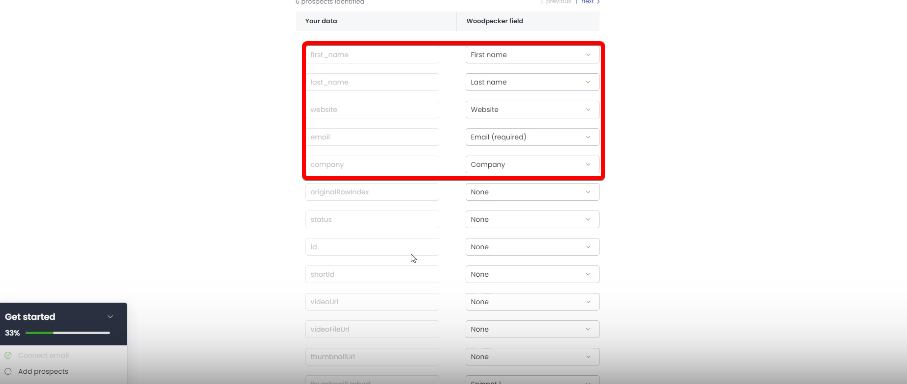
4.) Match your Scaloom analyses with the fields in Woodpecker
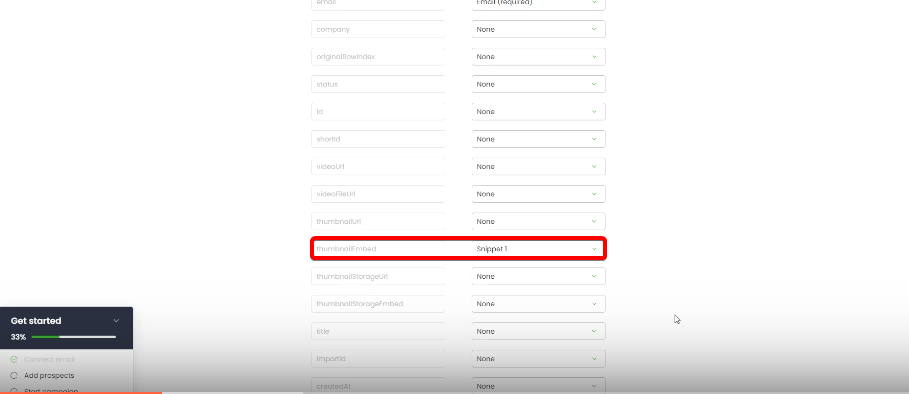
5.) Find "ThumbnailEmbed" and assign that as "Snippet 1"
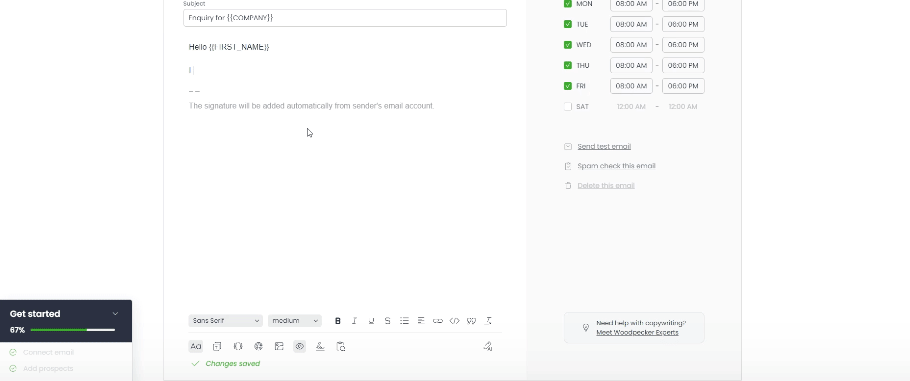
6.) Select "Campaigns" select your new campaign and design your email. By pressing on the curly bracket icon with the tooltip "Snippets" on the bottom, you can implement variables from your Scaloom analyses file to personalise your email for your prospects.
7.) Implement your Scaloom analyses! When you have decided where you want your Scaloom analyses to appear in your email, add "{{SNIPPET\_1}}" .
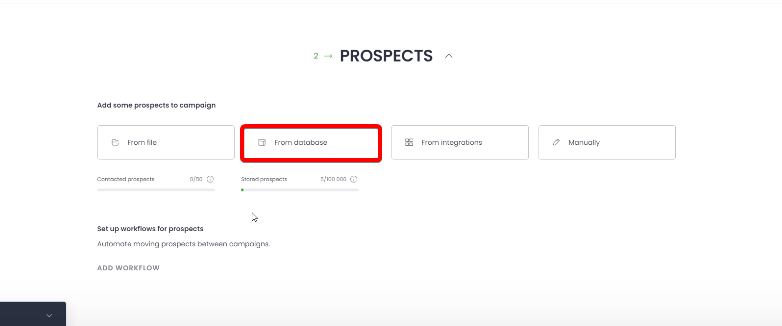
8.) Scroll down to "Prospects" and select from database.
9.) Select all the prospects you want to add to your campaign, then press "Add".
10.) Then scroll down to Summary and select Run!
Congratulations! Your Scaloom analyses are now ready to be sent out to your prospects!
---
# Agent Instructions: Querying This Documentation
If you need additional information that is not directly available in this page, you can query the documentation dynamically by asking a question.
Perform an HTTP GET request on the current page URL with the `ask` query parameter:
```
GET https://scaloom.gitbook.io/scaloom/integrations/how-to-use-scaloom-with-woodpecker.md?ask=
```
The question should be specific, self-contained, and written in natural language.
The response will contain a direct answer to the question and relevant excerpts and sources from the documentation.
Use this mechanism when the answer is not explicitly present in the current page, you need clarification or additional context, or you want to retrieve related documentation sections.