> For the complete documentation index, see [llms.txt](https://scaloom.gitbook.io/scaloom/llms.txt). Markdown versions of documentation pages are available by appending `.md` to page URLs; this page is available as [Markdown](https://scaloom.gitbook.io/scaloom/integrations/how-to-use-scaloom-with-lemlist.md).
# How to use Scaloom with Lemlist
1.) Export your rendered analyses from Scaloom as CSV files.
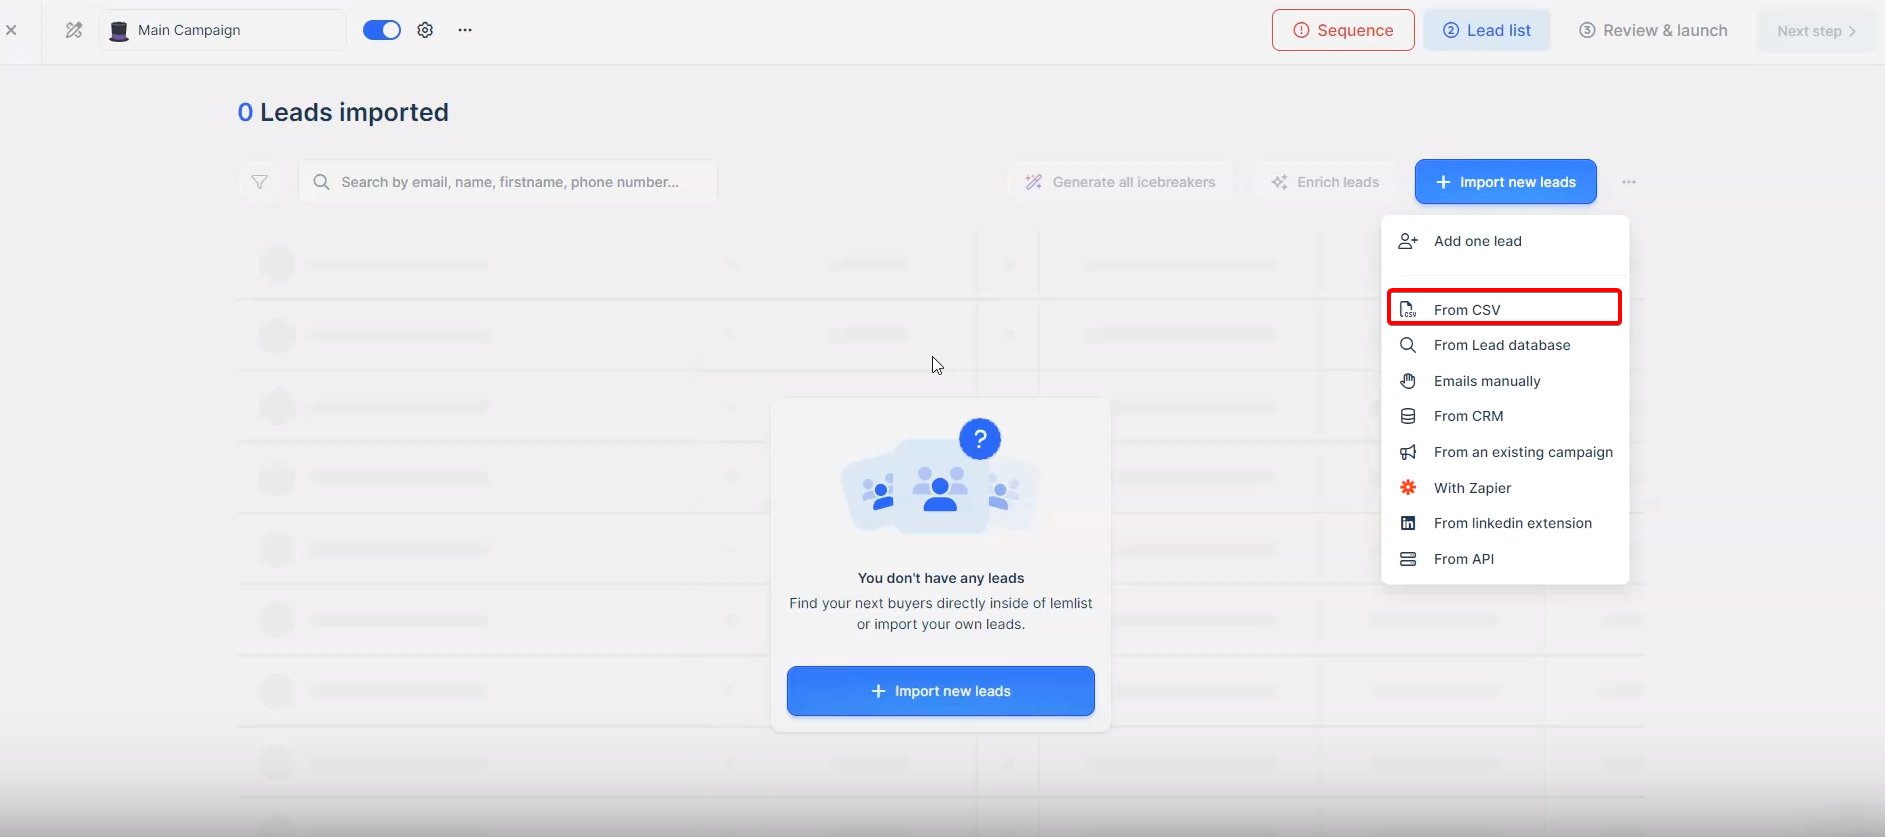
2.) Create a new campaign and select "From CSV" under the "Import New Leads" option
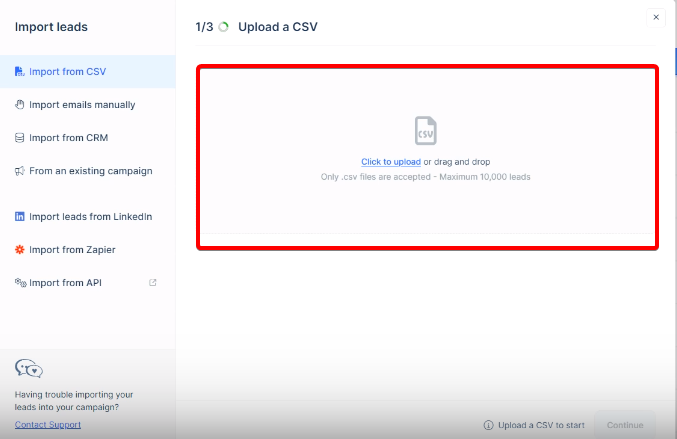
3.) Drag and Drop your CSV File
4.) Ensure that ThumbnailEmbed is assigned as a Custom Variable
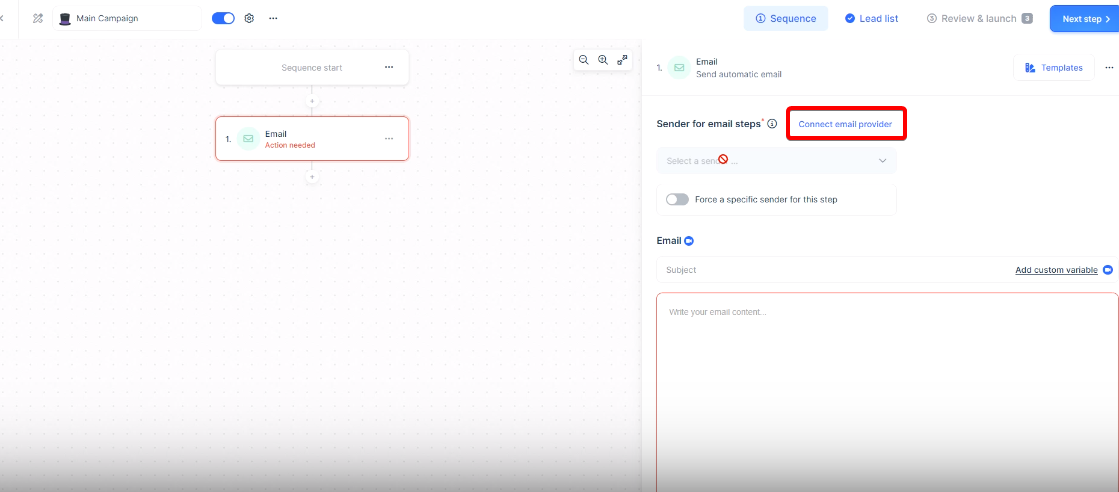
5.) Select Sequence in the top right corner
6.) Connect your email account that will be sending your outreach emails
7.) After writing your email to implement your Scaloom analyses add the custom variable "ThumbnailEmbed". This can be done through either pressing on the custom variable button or typing {{thumbnailEmbed}}
8.) Select Next Step in the top right corner
9.) Select the toggle box to select all leads then select "review leads" at the bottom of the page
10.) Click the settings icon in the top left of the screen
11.) Select Schedules
12.) Select the three dots then change the time between emails being sent out to 2 minutes