> For the complete documentation index, see [llms.txt](https://scaloom.gitbook.io/scaloom/llms.txt). Markdown versions of documentation pages are available by appending `.md` to page URLs; this page is available as [Markdown](https://scaloom.gitbook.io/scaloom/integrations/how-to-use-scaloom-with-closershq.md).

# How to use Scaloom with ClosersHQ

1.) Export your Scaloom Analyses as a CSV File

<figure><img src="https://1347108282-files.gitbook.io/~/files/v0/b/gitbook-x-prod.appspot.com/o/spaces%2FlRsZq3MJ50SRxl5uCypA%2Fuploads%2F925VfPSg6NJtS5r77eYe%2FCopie%20de%20Scaloom%20-%20video.gif?alt=media&amp;token=10e9e688-49a7-4ed3-9d2a-051e1ccfbf07" alt=""><figcaption></figcaption></figure>

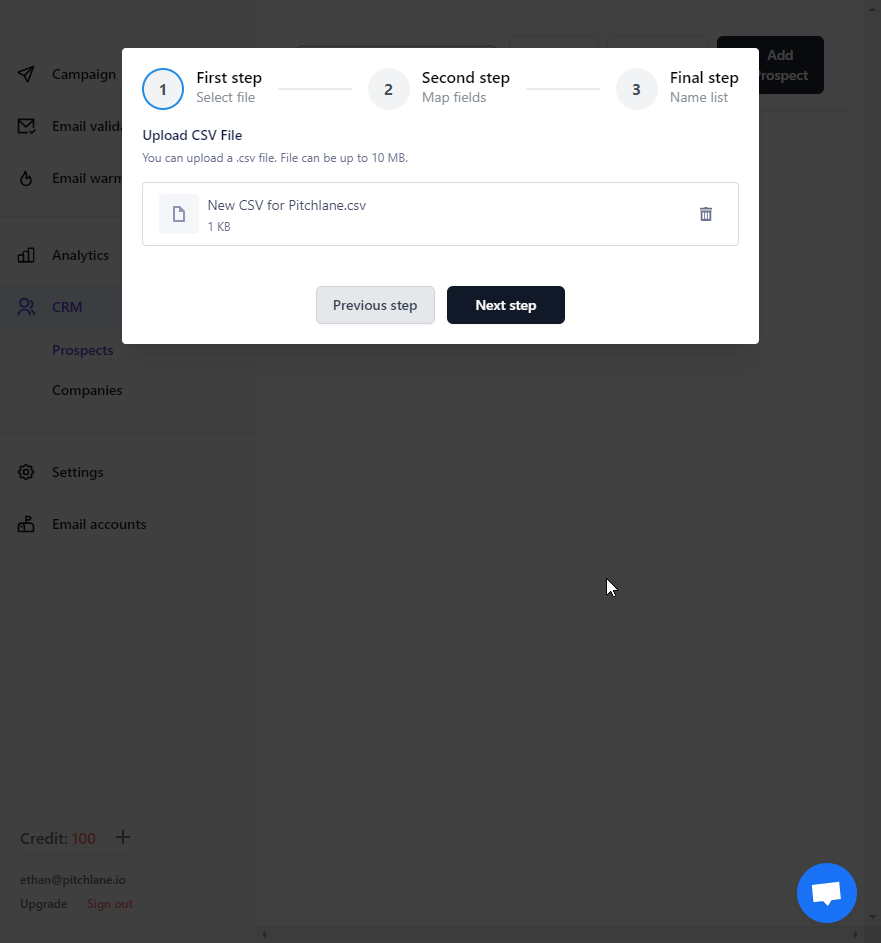
2.) Navigate to "CRM" and select "Prospects" and import Prospects

<figure><img src="https://staticfiles.gleap.io/helpcenter/6701473a5a5a3552b17b4d63/20241008121009_1077.png" alt=""><figcaption></figcaption></figure>

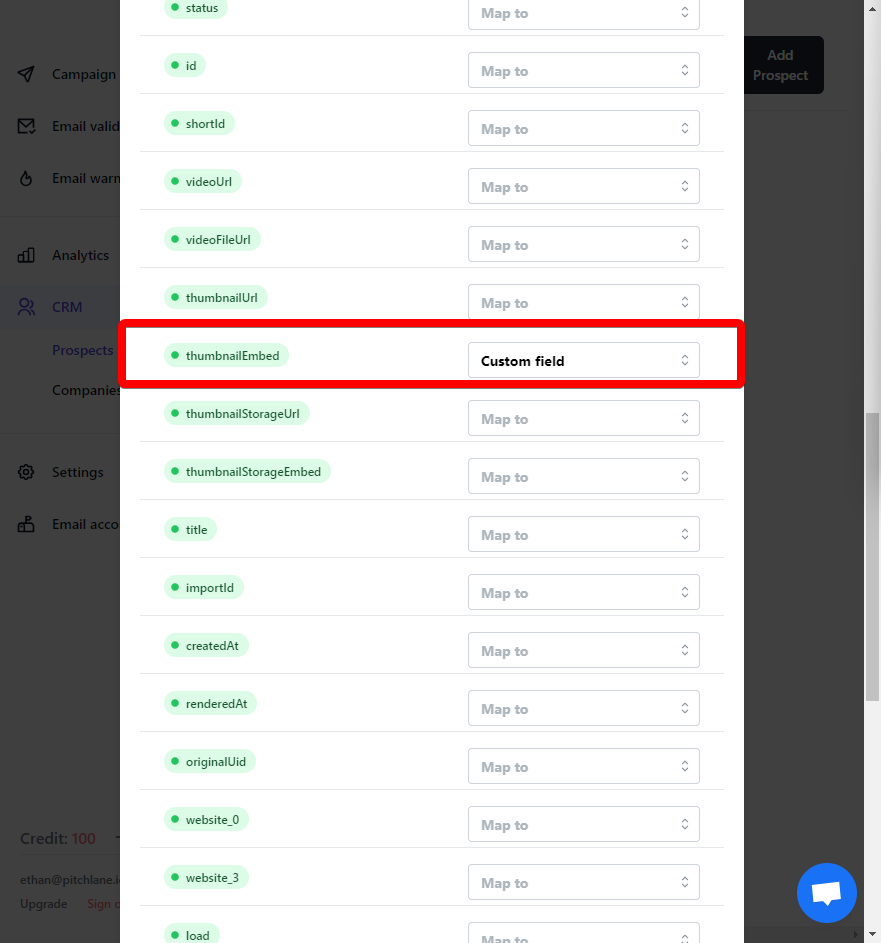
3.) Map the fields accordingly

4.) Locate the field titled, "thumbnailEmbed" and select "Custom field"

<figure><img src="https://staticfiles.gleap.io/helpcenter/6701473a5a5a3552b17b4d63/20241008121009_2229.png" alt=""><figcaption></figcaption></figure>

<br>

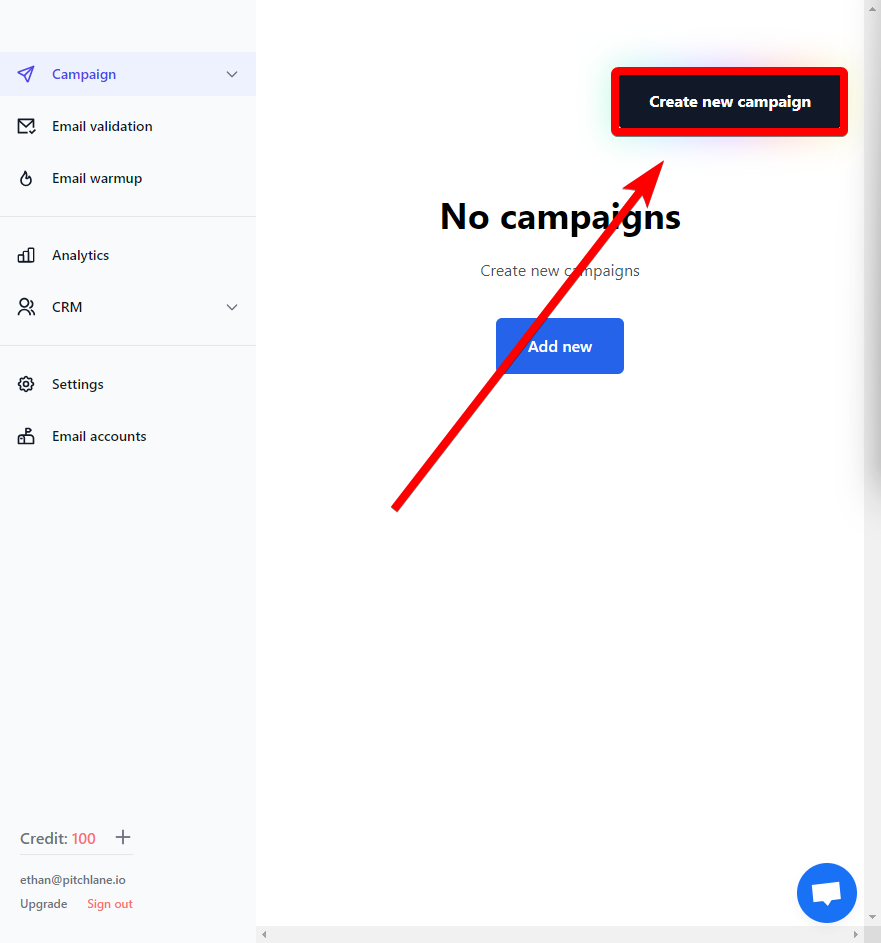
5.) Select, "Next Step" and navigate to the campaign tab

6.) Select "Create New Campaign"

<figure><img src="https://staticfiles.gleap.io/helpcenter/6701473a5a5a3552b17b4d63/20241008121011_0822.png" alt=""><figcaption></figcaption></figure>

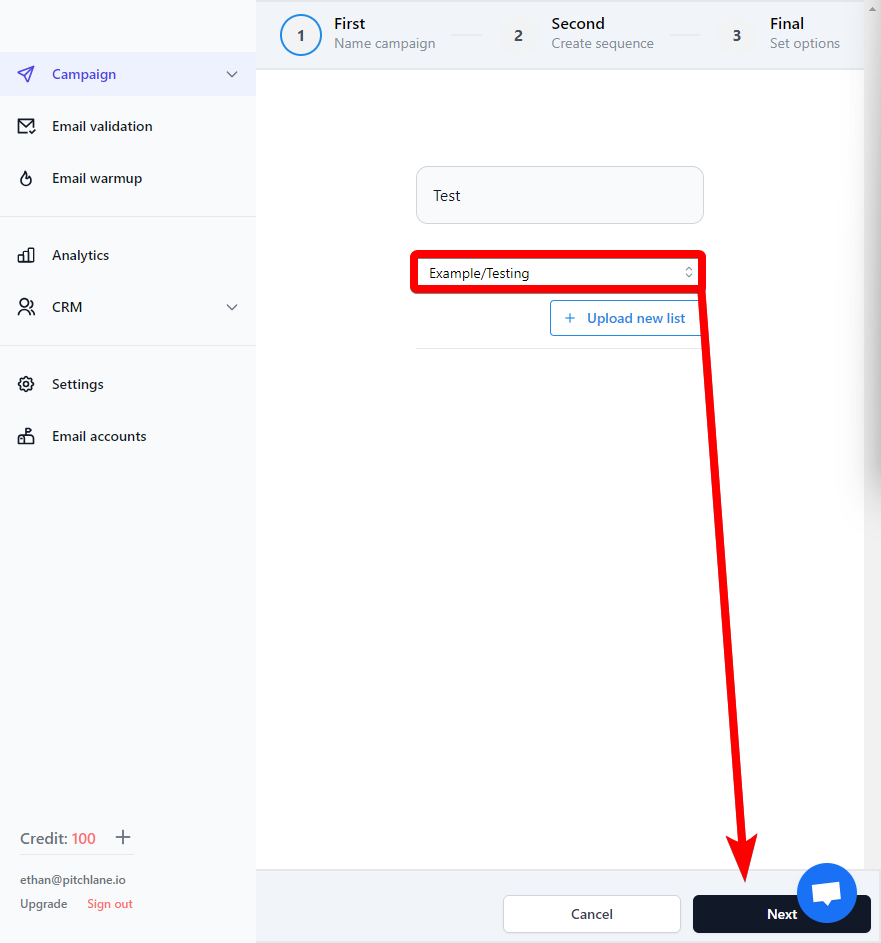
7.) Select your uploaded lead list and select next

<figure><img src="https://staticfiles.gleap.io/helpcenter/6701473a5a5a3552b17b4d63/20241008121011_7284.png" alt=""><figcaption></figcaption></figure>

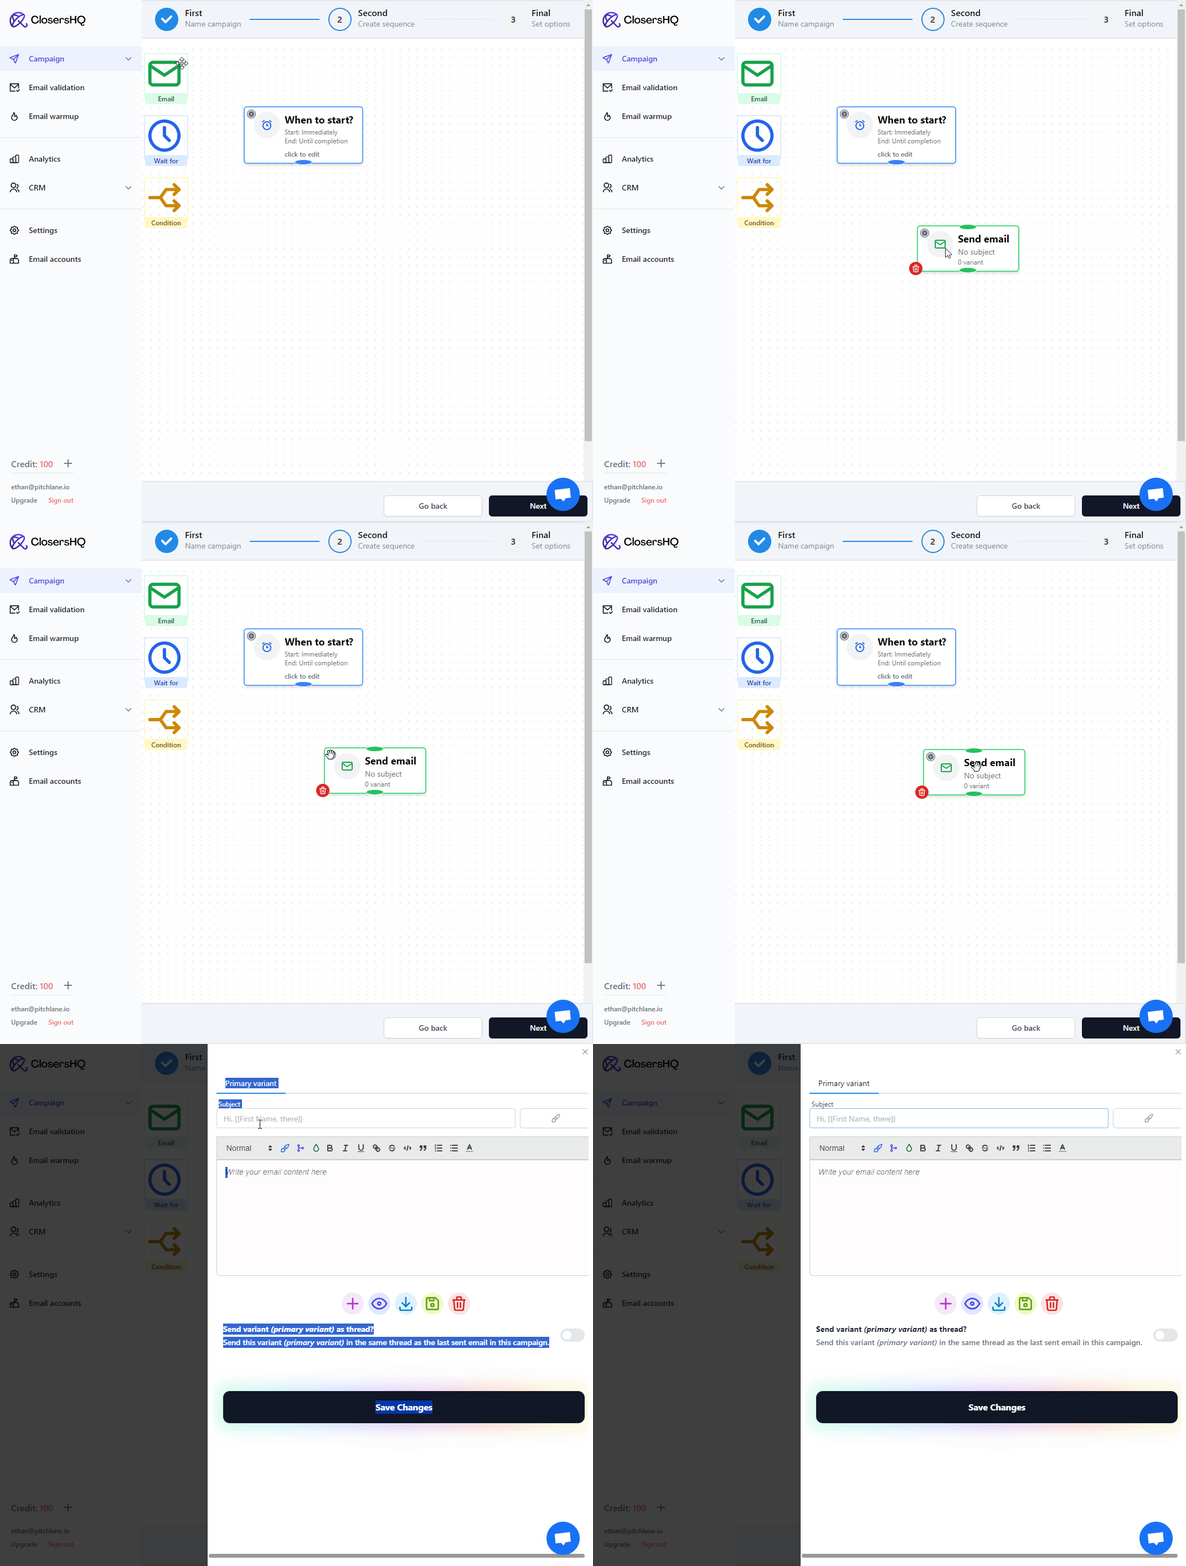
8.) Select a blank flow template and add an email action.

<br>

<figure><img src="https://staticfiles.gleap.io/helpcenter/6701473a5a5a3552b17b4d63/20241008121011_0064.gif" alt=""><figcaption></figcaption></figure>

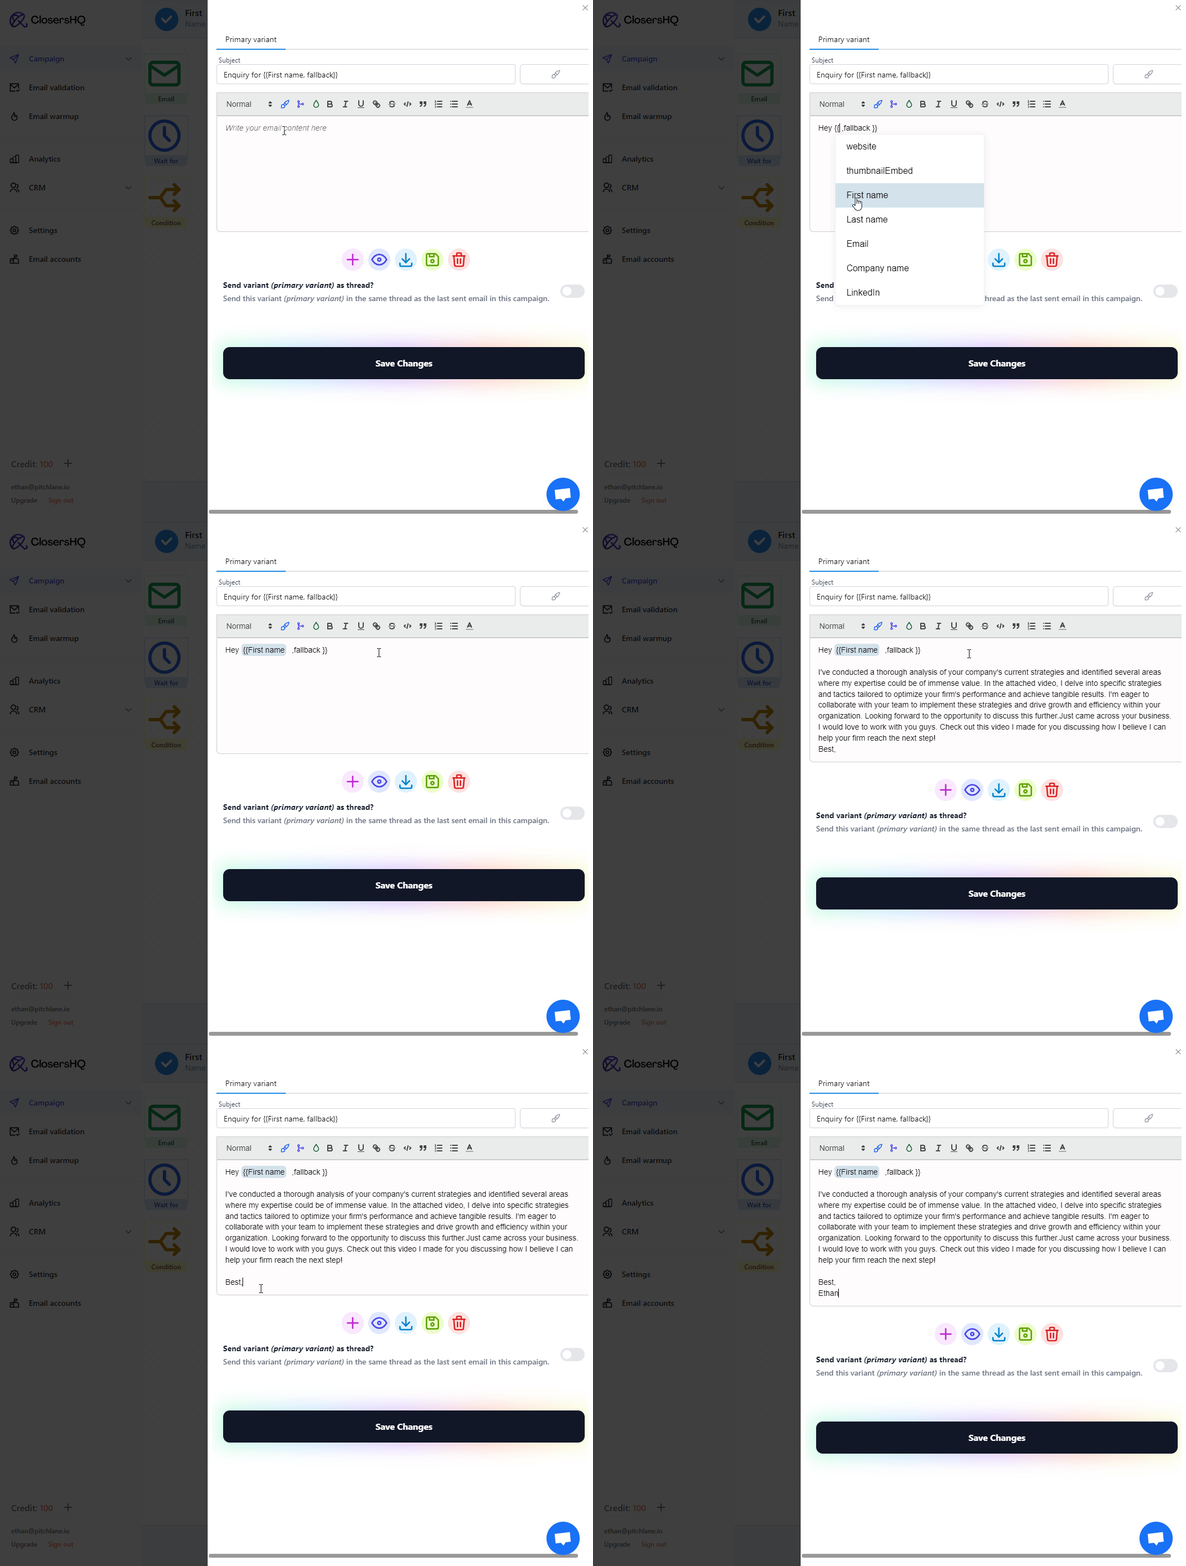
9.) Craft your outreach email

<figure><img src="https://staticfiles.gleap.io/helpcenter/6701473a5a5a3552b17b4d63/20241008121011_3401.gif" alt=""><figcaption></figcaption></figure>

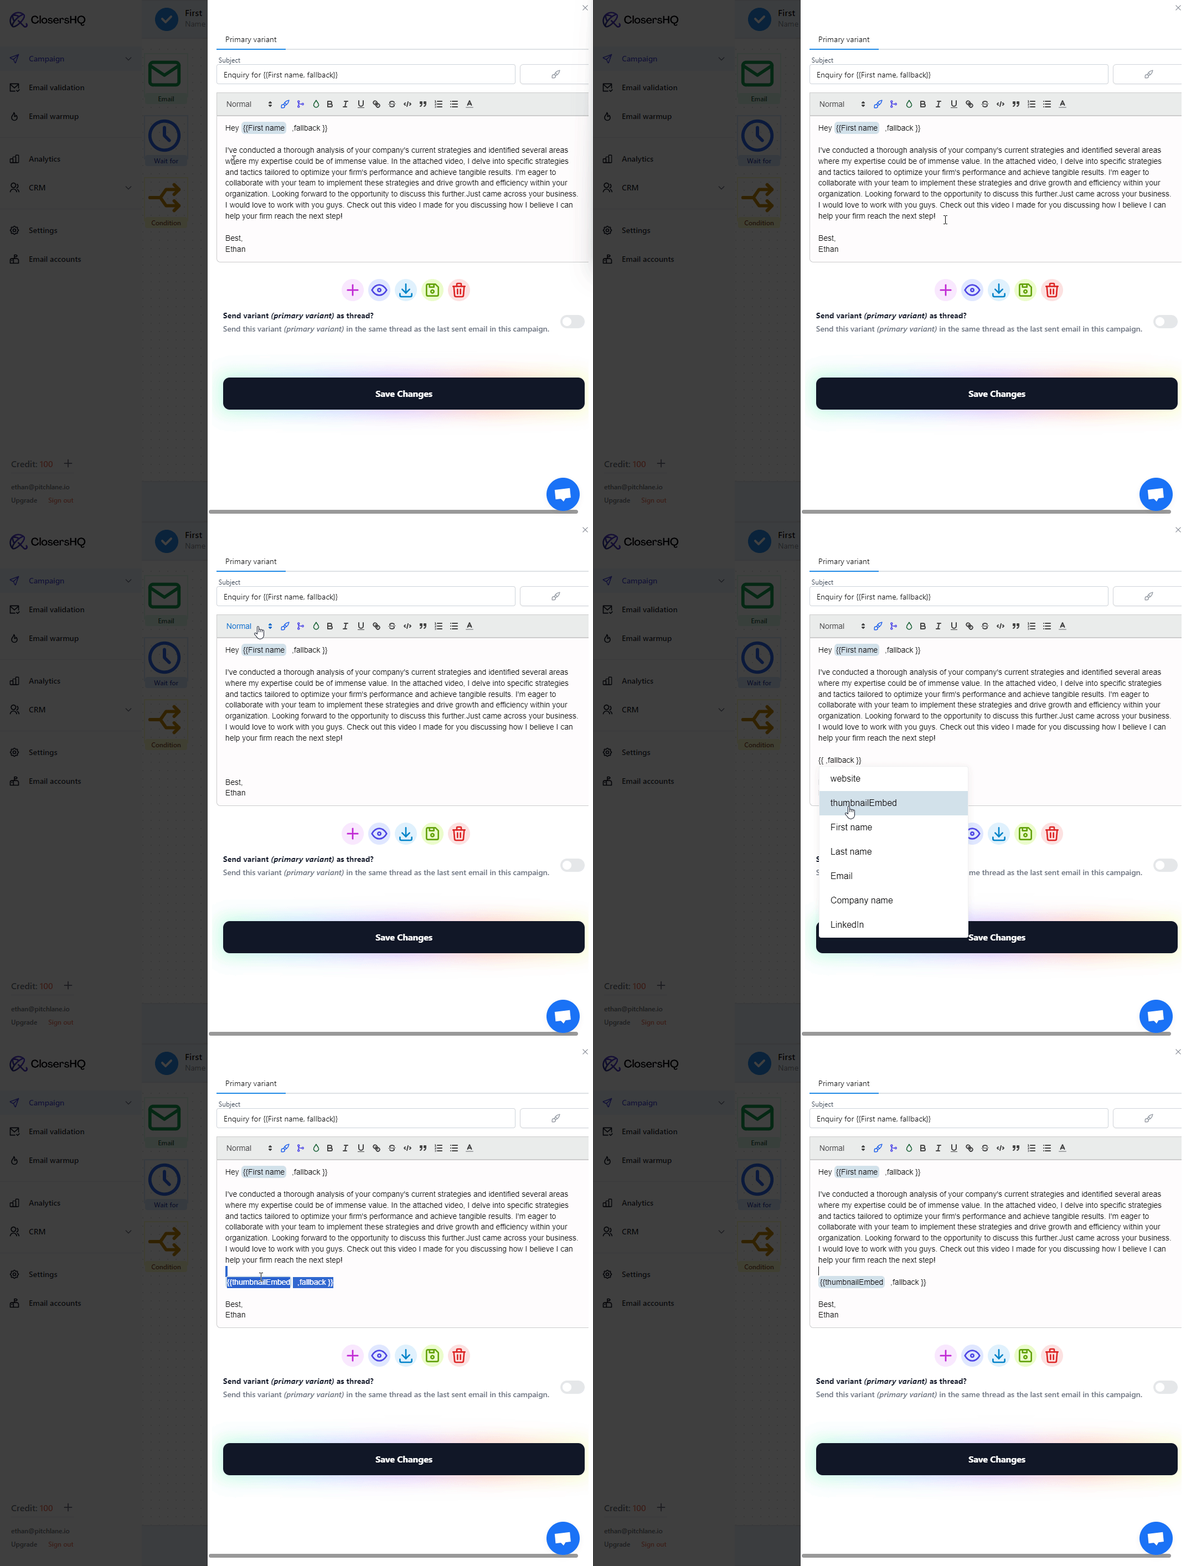
10.) Add your Scaloom Analyses

<figure><img src="https://staticfiles.gleap.io/helpcenter/6701473a5a5a3552b17b4d63/20241008121011_8025.gif" alt=""><figcaption></figcaption></figure>

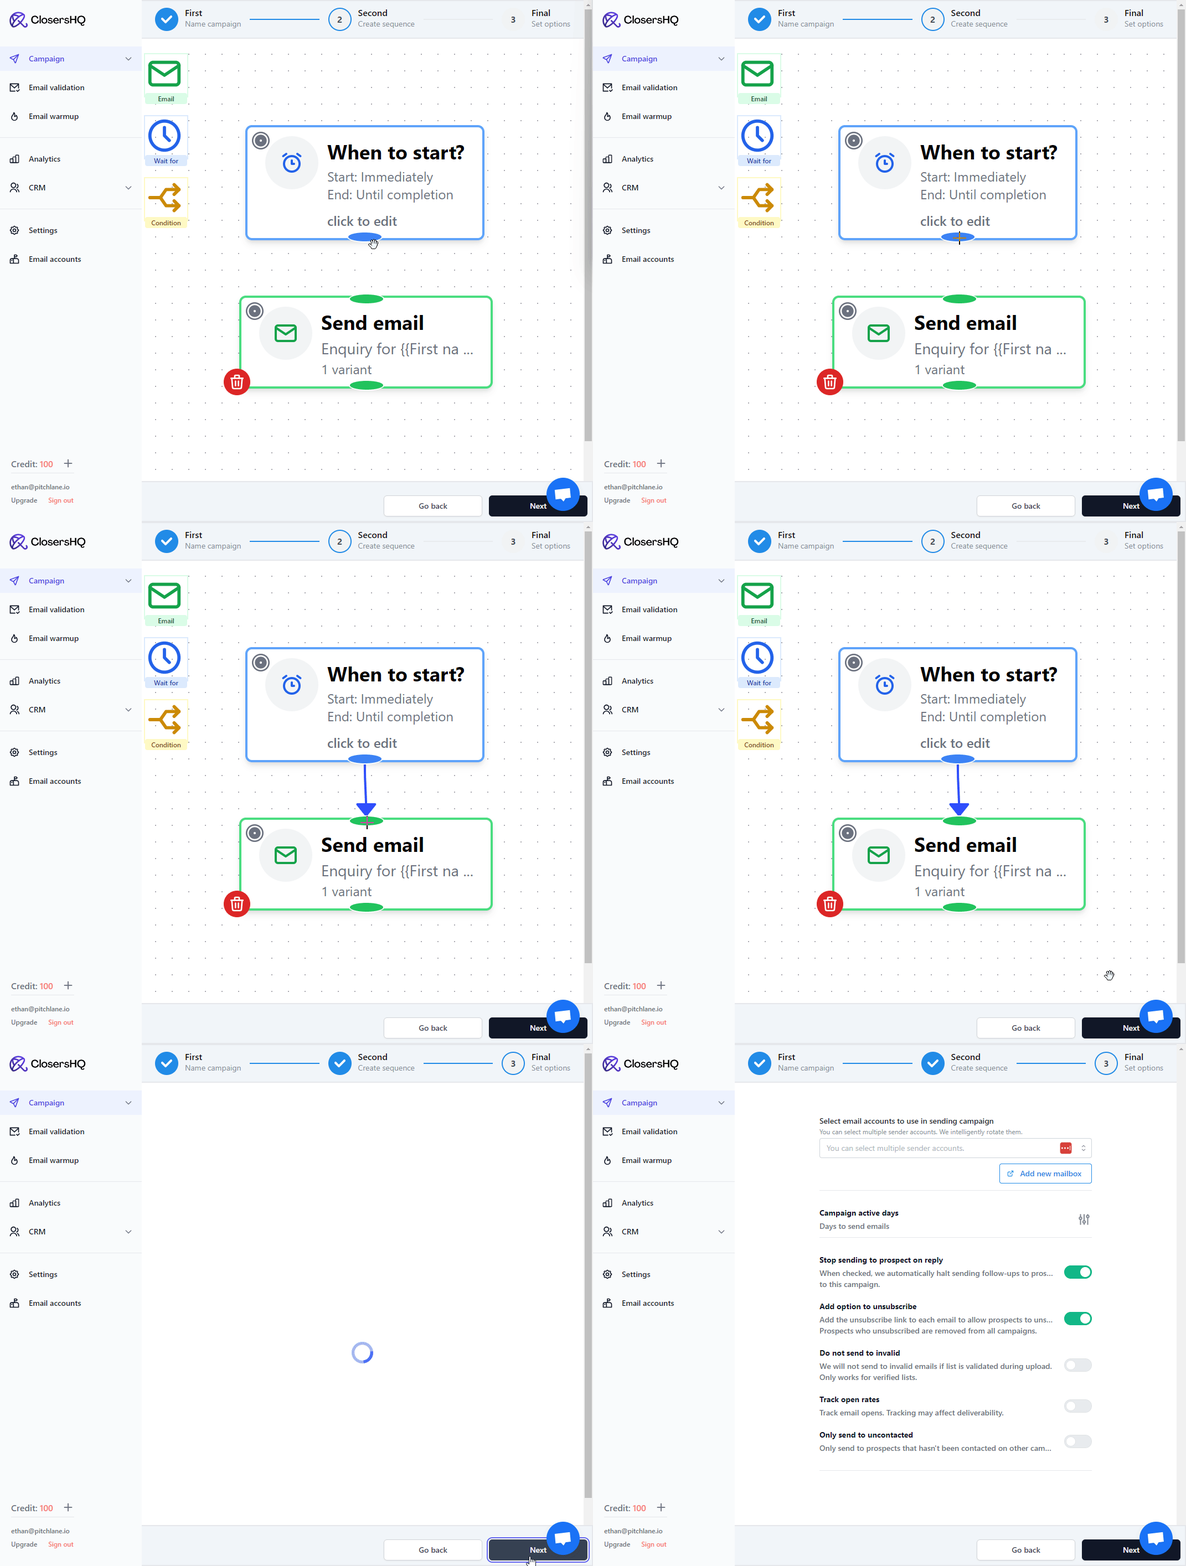
11.) Connect the elements of your campaign and Select, "Next"

<figure><img src="https://staticfiles.gleap.io/helpcenter/6701473a5a5a3552b17b4d63/20241008121013_9036.gif" alt=""><figcaption></figcaption></figure>

12.) Turn on your campaign and start sending out your outreach!